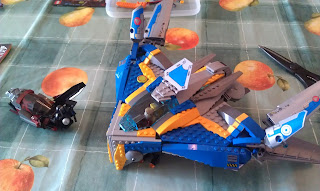
Sorry Star Wars fans, but this, perhaps together with Benny`s Spaceship, was the best starship Lego produced in 2014.
No dull grey colourscheme, intresting building techniques, and really well in hand for a dose of swoosh swoosh, it was a surprise hit, just like the Guardians of the Galaxy movie it hailed from.
As the seals crack, we get the instructions, the stickersheet and 6 bags of bricks to build the largest set from the 3 set wave of the franchise.
The first bag includes Star-Lord, now in his Ravager uniform compared to his Starblaster Showdown version, and the Kree pilot for the small Kree vessel in the set.
And the `big gun`...
The first thing we are going to build is said Kree fighter. Similar yet different from the other version in again Starblaster Showdown, it`s made around a red plate and black undercanopy pieces as the core.
The controls are inserted in the pilot area.
The ion drive looks really great by using trans blue dishes.
Finally, the wings and canopy are added and the small vessel is completed.
Next we`re getting the Ronan minifigure, compleet with his big hammer and control orb that houses the Infinity Stone.
The Milano itself is build around the central part which can seat all the members of the Guardians (bar Groot), to which the engineering area is then connected.
The underside gets the hover engines, with flick fire missiles for the front side as well as stud blasters. This allows the vessel to rest on a flat surface without the nose assembly being in the way.
The upper side is build up, and we get to see the location of where the raised pilot are will be housed.
The next bag gives us Drax the Destroyer, in all his tattoed glory. I personally like this figure the best from the set, and his printed arms are awesome.
While the pilots chair is installed, we also put in the tape deck, so you can play `Mix Tape Number 1` while zooming through the living room.
The second part of the hull is then on the list. Using Technic bricks to be able to SNOT the hull plating later on, the arch is formed that maked the typical shape of the Milano.
This is then connected to the bodywork and closed up using sloped parts.
The engines consist of one big drive and two moveable smaller ones.
The final minifigure we get is Gamorra. Nice hairpiece!
First up are the slopes that make the nose, which are then connected to the Technic frame.
The wings are solid and strongly build, using again a Technic frame as a base, and these will be attached to the bodywork that way.
The wingtips are following the same pattern, and everything can click nicely into place, and small, poseable wing extensions are then added.
As well as a flap to arrange the altitude of the vessel.
The other side is almost an exact mirror build, bar some very small details on the wings, completing the ship`s known shape itself.
More details are added to the underside of the wings.
The final part is to build the canopy for the vessel, which also folds open to have access to the compartments behind the pilot.
Roight, and that ends the regular build BUT...
I have that special promo Rocket polybag, and it came with a `Pimp your Milano` stickersheet. From that, I used a few for some additional detailing.
There are of course some additional parts...
And the set stands completed.
I LOVE the Guardians wave, and bar the SDCC exclusive which I`m not getting, I now have all the regular sets and the Rocket in Ravager polybag sets completed, proudly displayed in a cabinet:
I`m really hooked on a feeling ;-)
From MartinC The Empire of Mars (74 pts) (DRAFT) (BONUS ROUND)
-
As we all, hopefully, had a happy new year, little did we realise we were
being watched. The evil empire had sown division amongst us, making us
distrust...
1 uur geleden


.jpg)


.jpg)


Geen opmerkingen:
Een reactie posten